


Maintaining your bike’s performance is crucial for an enjoyable riding experience, and one of the essential components to check regularly is the spark plug. This small yet significant part ignites the fuel-air mixture in the engine, facilitating smooth combustion. Over time, spark plugs can wear out, leading to diminished performance, increased fuel consumption, and potential engine issues. In this guide, we will walk you through the simple steps to replace your motorcycle’s spark plug easily and efficiently.
Replacing a spark plug might seem daunting for some motorcycle owners, but with the right tools and a bit of guidance, it can be tackled in under an hour. Knowing when to replace your spark plug is just as important as the replacement process itself. Signs such as poor acceleration, difficulty starting, or a noticeable decrease in fuel efficiency indicate it may be time for a change. Let’s dive into the steps needed to restore your bike’s power and performance by replacing its spark plug.
This guide will provide you with detailed instructions on the tools required, how to safely remove the old spark plug, and tips for properly installing the new one. With a little effort, you’ll be able to keep your motorcycle running smoothly and enjoy every ride to the fullest.
Tools Needed for Spark Plug Replacement on Your Motorcycle
Replacing the spark plug on your motorcycle is a straightforward process that requires specific tools to ensure the job is done efficiently. First, you will need a spark plug socket, which is designed to grip the spark plug securely. This socket often has a rubber insert that helps to prevent damage to the plug during removal and installation.
A ratchet wrench is essential for using the spark plug socket, providing the necessary torque to loosen and tighten the plug effectively. Additionally, a torque wrench is highly recommended to ensure that the new spark plug is tightened to the manufacturer’s specified torque settings, thus avoiding potential damage during the repair.
Furthermore, a gap tool or feeler gauge is useful to check the spark plug gap before installation, ensuring proper performance. A pair of pliers may also come in handy for removing the spark plug wire cap, as it can be tight and difficult to pull off by hand.
Lastly, having a clean cloth and some anti-seize compound on hand can facilitate a smoother installation. The compound prevents corrosion and makes future removal easier, ensuring your repair process is hassle-free next time. With these tools, you can confidently replace the spark plug and maintain optimal engine performance.
Step-by-Step Process for Removing and Installing Spark Plugs

To begin, ensure your bike is on a stable surface and the engine is cold. This prevents burns and ensures safety during the repair process.
First, locate the spark plugs on your motorcycle. Typically, they are found on the cylinder head. Remove any covers if necessary to access them. Use a socket wrench with the appropriate size socket to fit the spark plugs.
Next, disconnect the spark plug wire by gently pulling it straight off. Avoid twisting or using excessive force. Once the wire is removed, take your socket wrench and turn it counterclockwise to unscrew the old plug. Be cautious not to drop debris into the cylinder head.
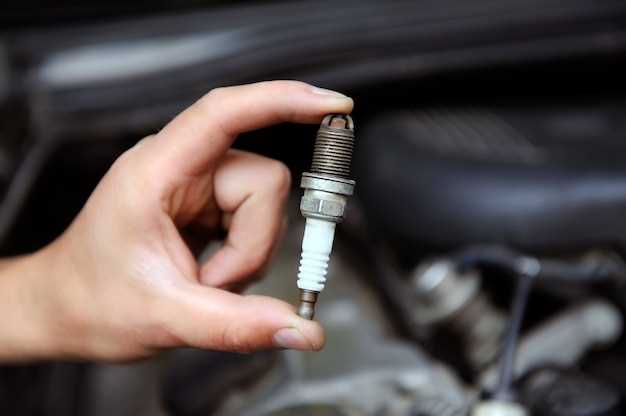
After removing the old plug, inspect it for wear or damage. If it’s dirty, clean the area around the spark plug hole to prevent contaminants from entering the engine. Now, take your new spark plug and check its gap using a feeler gauge to ensure optimal performance.
Apply a small amount of anti-seize compound to the threads of the new plug to facilitate easier removal in the future. Carefully screw it into the cylinder head by hand to avoid cross-threading, then tighten it with the socket wrench. The recommended torque specifications can be found in your bike’s manual.
Once the new plug is secured, reconnect the spark plug wire firmly over the new plug. Make sure it clicks into place, ensuring a good electrical connection. If necessary, repeat the same process for any additional spark plugs.
Finally, double-check all connections and components before starting your bike. Once everything is in place, turn on the engine to ensure it runs smoothly. Your spark plug replacement is now complete!
Troubleshooting Common Issues After Spark Plug Replacement
After replacing your motorcycle’s spark plug, it’s essential to ensure everything is functioning correctly. Here are some common issues and their solutions to help you troubleshoot effectively.
1. Difficulty Starting the Engine
If your motorcycle struggles to start, it may indicate improper spark plug installation. Check the following:
- Spark Plug Gap: Ensure that the gap between the electrodes is set according to manufacturer specifications. A gap that is too wide or too narrow can hinder ignition.
- Wiring Connections: Verify that all wiring and connections are secure. Loose or damaged wires can prevent the spark from firing correctly.
2. Rough Idling or Misfiring
If you experience rough idling or misfiring after replacing the spark plug, consider these points:
- Correct Plug Type: Make sure the replacement plug is the right type for your motorcycle. Using an incorrect plug can lead to compatibility issues.
- Fuel Quality: Poor fuel quality can cause combustion issues. Replace the fuel if necessary and ensure it meets the recommended octane level.
3. Decreased Fuel Efficiency
Noticing a drop in fuel efficiency after replacement? This could stem from:
- Excessive Carbon Buildup: Check for carbon buildup in the combustion chamber. If present, it may indicate a need for further repair beyond just the spark plug.
- Air-Fuel Mixture: An incorrect air-fuel mixture can affect efficiency. Assess carburetor settings or fuel injection systems to ensure proper function.
4. Engine Overheating
Excessive heat could signal that your new spark plug is not functioning correctly:
- Heat Range: Verify that the spark plug’s heat range is appropriate for your bike. Using a plug that is too hot can contribute to overheating.
- Cooling System: Check your motorcycle’s cooling system. Insufficient coolant flow may also lead to overheating after a spark repair.
By carefully reviewing these issues and conducting thorough checks, you can ensure that your motorcycle runs smoothly post-spark plug replacement. If problems persist, it may be wise to consult a professional mechanic for further diagnostics.


